Release Flags
Use Feature Flags to control the rollout of new features to your users or companies. devunus supports 3 different types of flags:
- Release Flags (Roll out a feature to a subset of users, normally 10% of users and then increase the percentage if the feature is working as expected)
- Experiments (A/B testing)
- Kill Switches (Disable a feature, such as a 3rd party dependency, or maintenance window)
Below we will go over the process of releasing a new feature using a Release Flag.
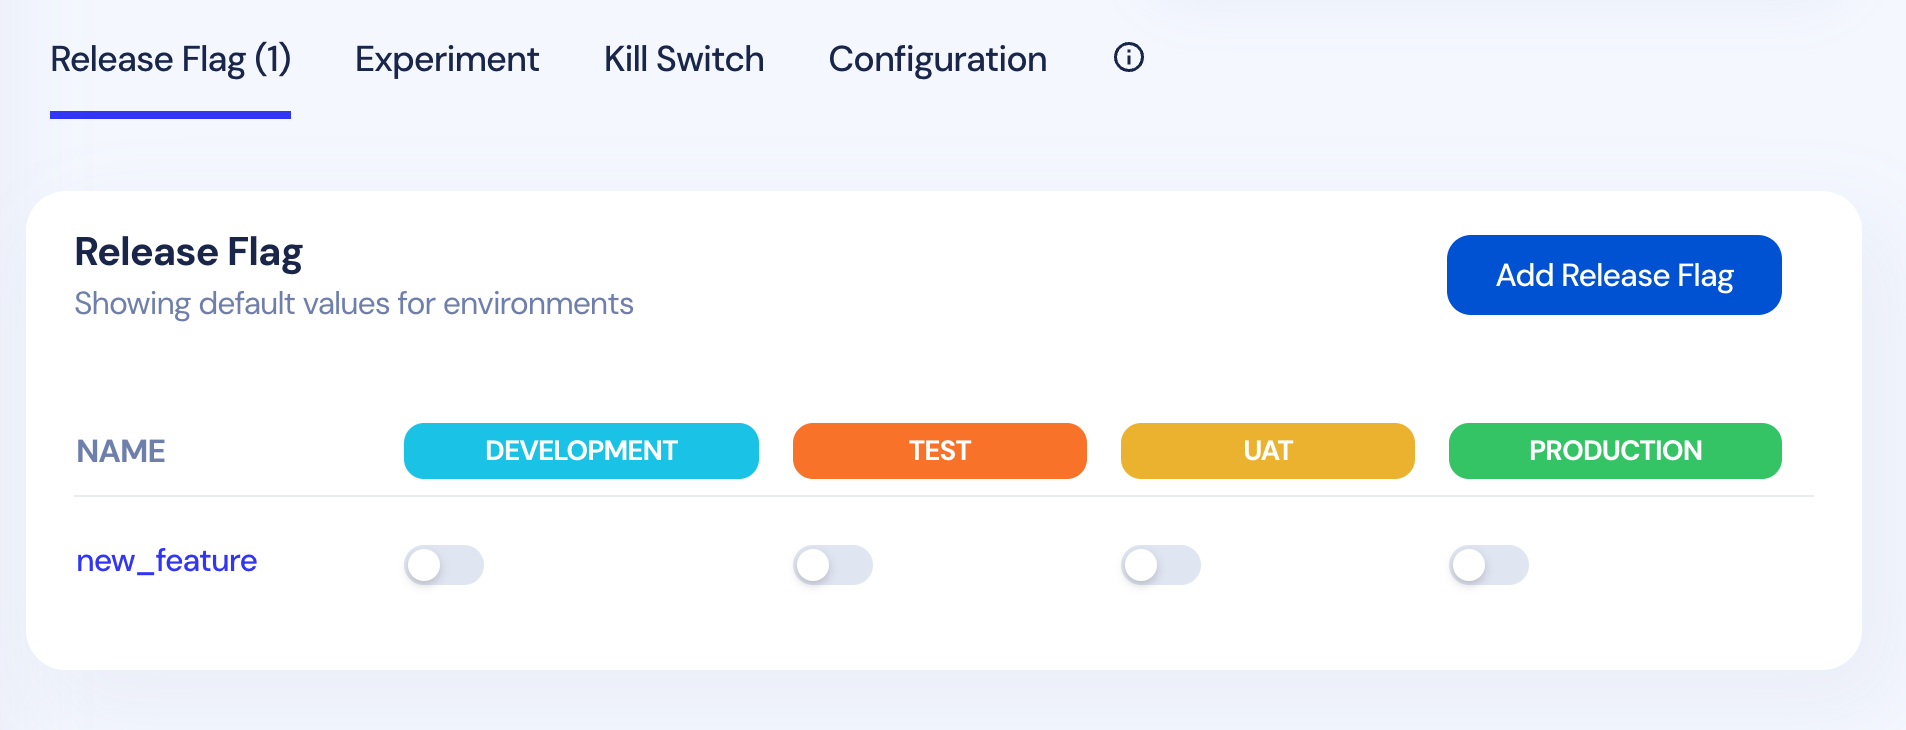
Step 1 - Create a Release flag
Go to Feature Flags from the menu and click Add Release Flag
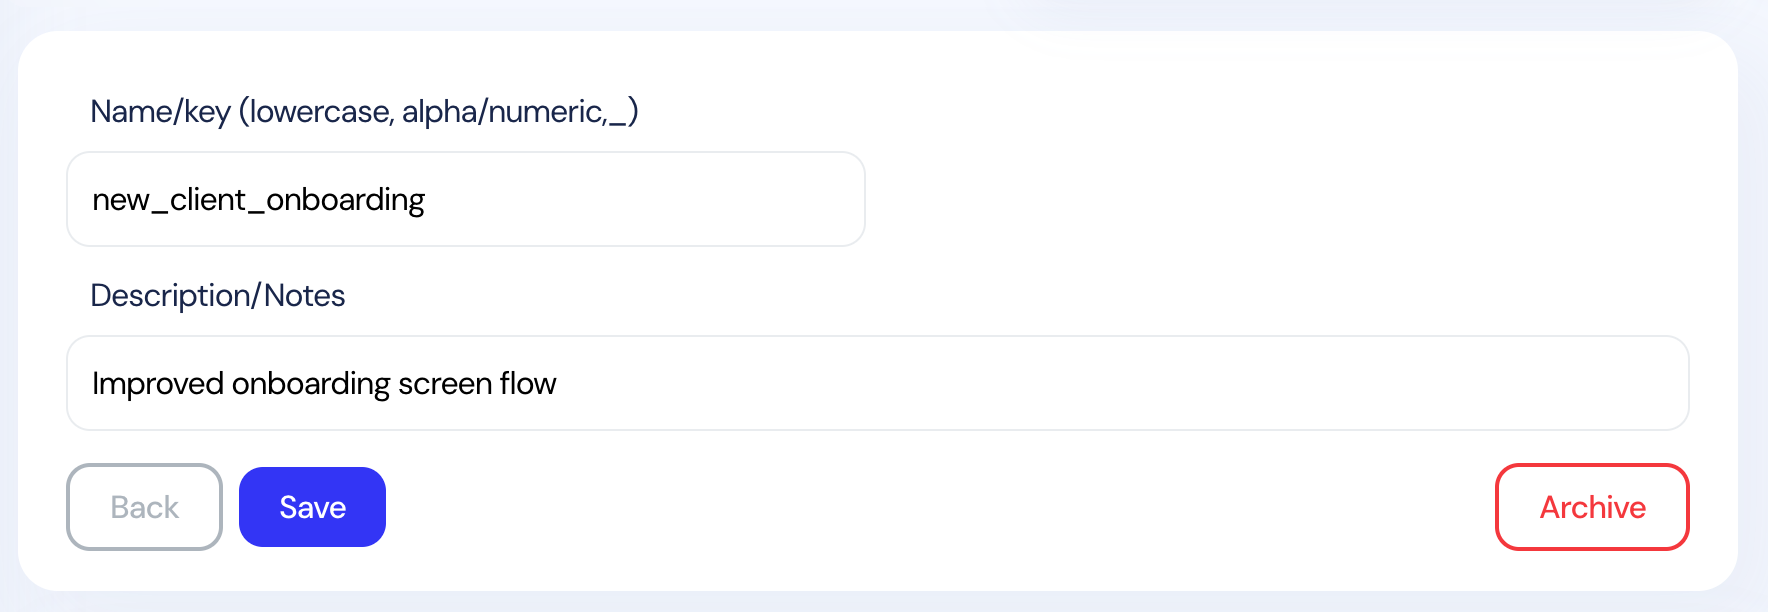
Enter a name and description for the flag. For our example we will add a new client onboarding flag for a CRM product.
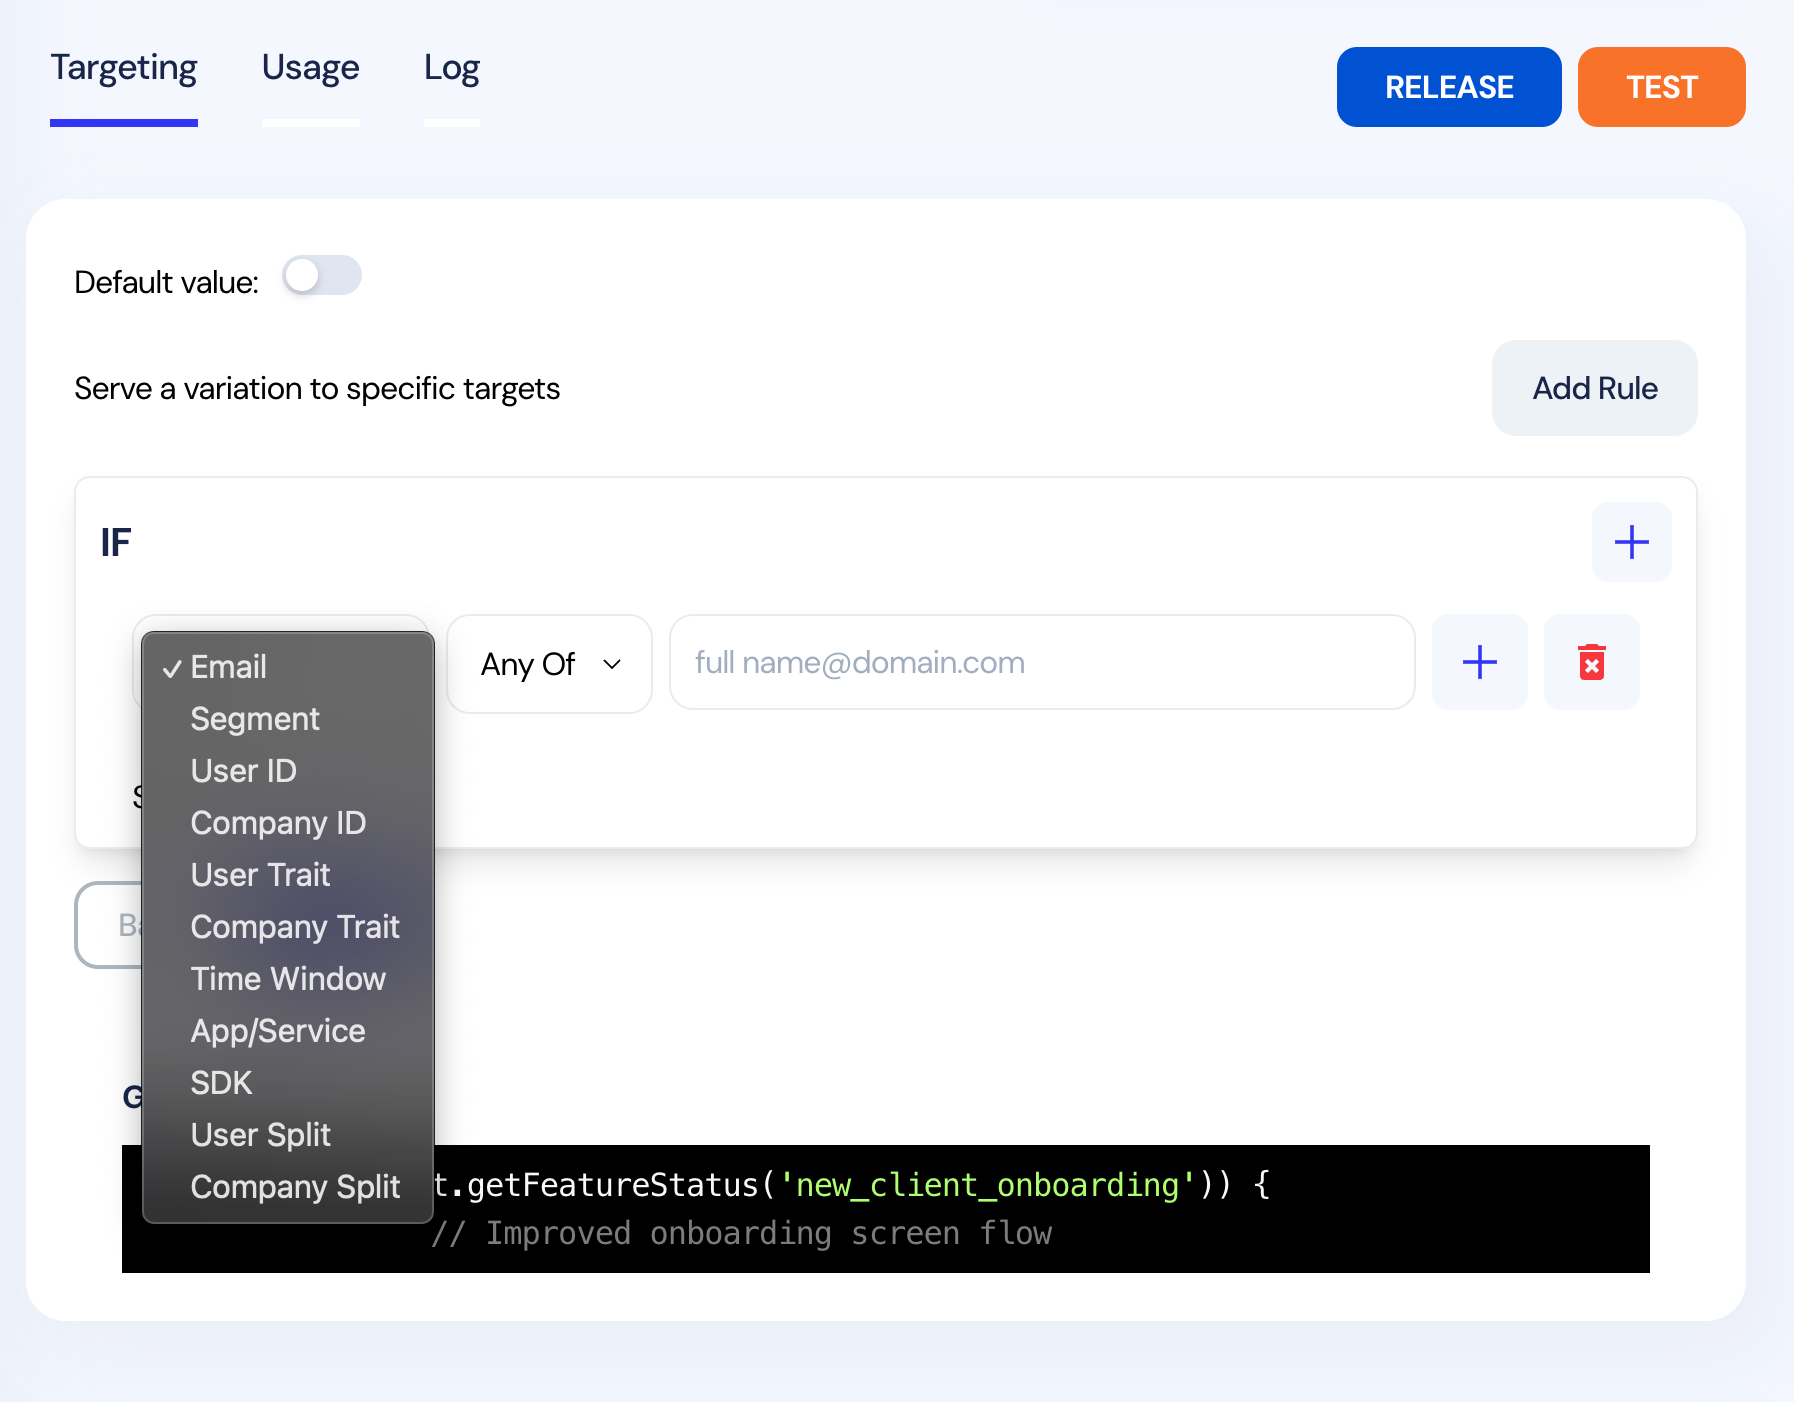
Step 2 - Add targeting rules
Assign a default value for each environment, or set up more complex targeting rules for example targeting a small section of your users.
Step 3 - Use the new flag using the devunus SDK
Now that you have created a new flag, you can use it in your application.
see getting started for more information on how to install the SDK. Javascript example below:
if (devunusClient.getFeatureStatus('new_client_onboarding')) {
  // show new onboarding experience
} else {
  // show old onboarding experience
}
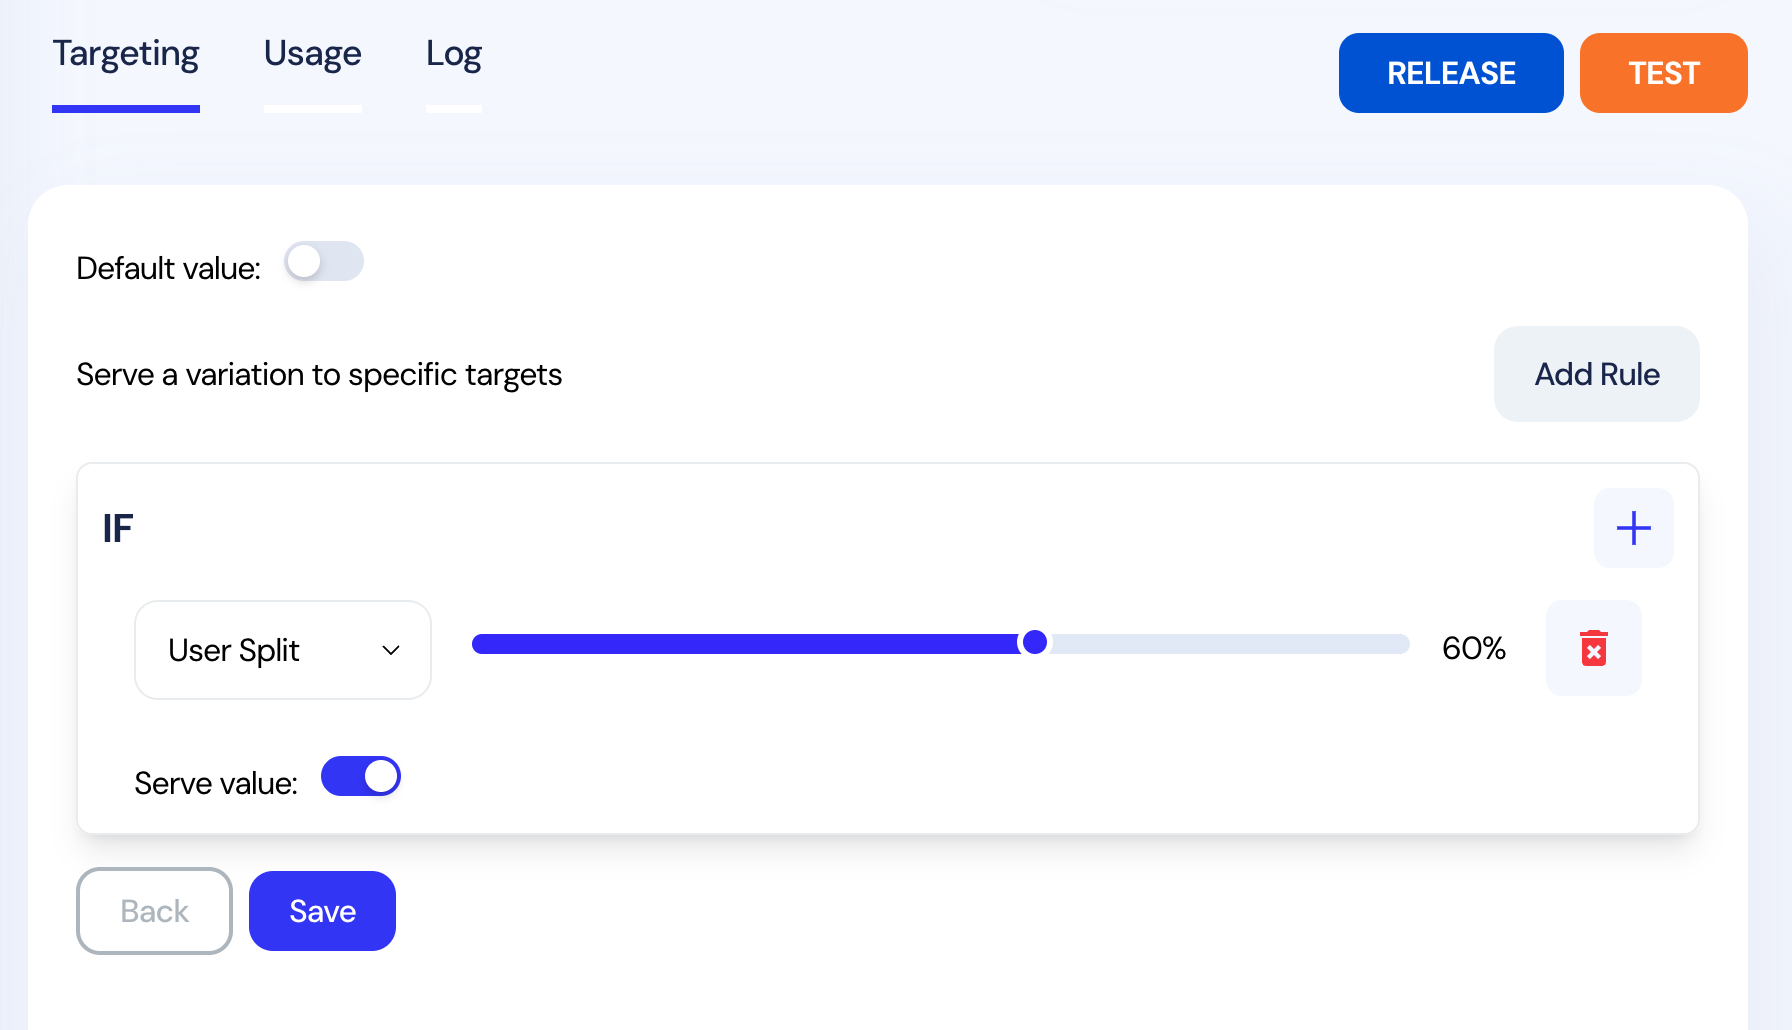
Step 4 - Update Rules to slowly rollout the change to all users
Monitor the feature to ensure it is working as expected. Use analytics to identify any issues.
Gradually increase the number of users receiving the new feature by updating the targeting rules. If issues arise, roll back the distribution.
In the example below we will roll out the new onboarding experience to 60% of our users.
Step 5 - Feature Rolled out
Once the feature is fully rolled out, remove the flag from your code.